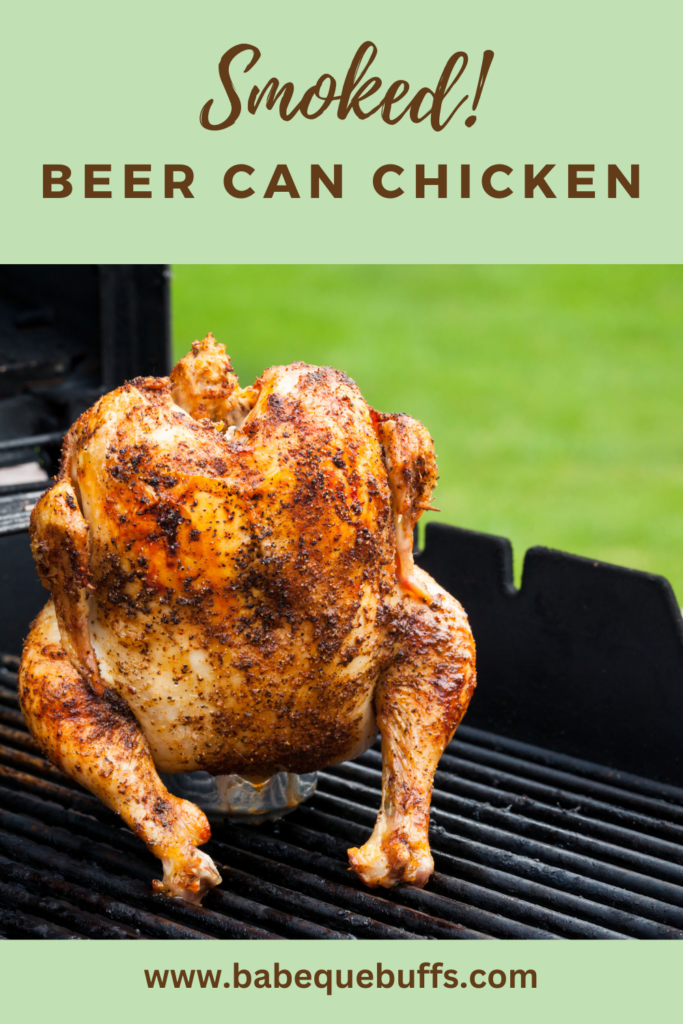
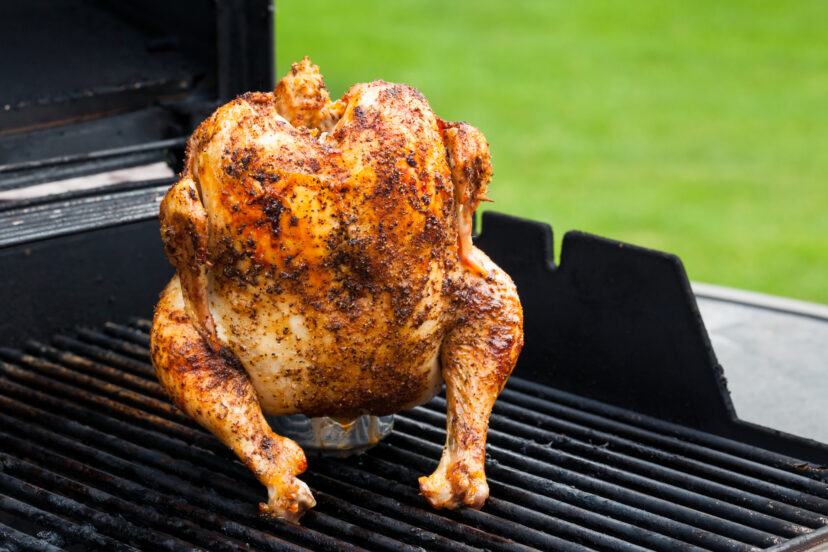
Our Smoked Beer Can Chicken!
As a passionate outdoor cooking and barbeque guy, I’ve experimented with countless recipes over the years. But let me tell you, there’s something truly special about smoked beer can chicken. It’s a dish that never fails to impress, combining the smoky allure of barbecue with the unique moisture-infusing properties of the classic beer can method. In this article, I’m excited to share my tried-and-true recipe and techniques for creating the perfect smoked beer can chicken. Whether you’re a seasoned pit-master or a curious beginner, this guide will help you elevate your outdoor cooking game to new heights.
What is Beer Can Chicken?
Beer can chicken, also known as “beer butt chicken” or “drunk chicken,” is a cooking method where a whole chicken is cooked upright with a partially filled beer can inserted into its cavity. This technique has been around for decades, but when combined with smoking, it creates a flavor profile that’s out of this world.
Benefits of Smoking Beer Can Chicken
Smoking your beer can chicken adds an extra layer of flavor and tenderness that you just can’t achieve with traditional grilling or oven-roasting. The low-and-slow cooking process allows the smoke to penetrate deep into the meat, while the beer steams from within, keeping the chicken incredibly moist. Plus, the upright position of the chicken allows the fat to drip away, resulting in crispy skin and leaner meat.
Ingredients and Equipment: Setting the Stage for Success
Essential Ingredients
To make my signature smoked beer can chicken, you’ll need:
- 1 whole chicken (3-4 pounds)
- 1 can of beer (your favorite variety- doesn’t really matter)
- 2 tablespoons olive oil
- 3 tablespoons of your favorite BBQ rub
Necessary Equipment
Here’s what you’ll need to get smoking:
- A smoker (offset, charcoal, or pellet)
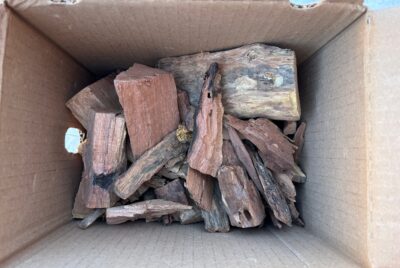
- Wood chips or chunks (I prefer a mix of apple and hickory)
- Meat thermometer
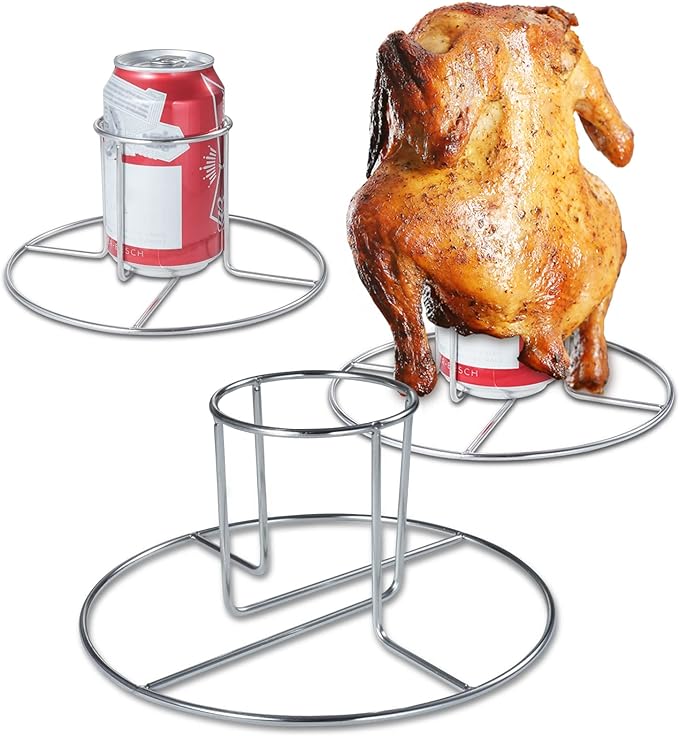
- Beer can chicken holder (optional, but recommended)
Optional Add-ons
To take your smoked beer can chicken to the next level, consider these extras:
- Basting brush
- Spray bottle for apple juice or beer
- Heavy-duty aluminum foil
Preparing the Chicken
Cleaning and Patting Dry
Start by removing the giblets if there are any from the chicken cavity and giving it a good rinse under cold water. Pat the chicken dry with paper towels, inside and out. This step is crucial for achieving crispy skin, so don’t skip it!
Seasoning the Chicken
Now, let’s infuse some flavor. Rub the chicken all over with olive oil, then generously apply your BBQ rub. Make sure to get under the skin and inside the cavity for maximum flavor penetration. I like to do this step a few hours before smoking, or even the night before, to let the flavors really sink in.
Preparing the Beer Can
Here’s a pro tip: don’t just stick a full beer can in your chicken. Instead, drink about a third of the beer. This leaves room for the liquid to steam and flavor the chicken from the inside. You can also add some of your BBQ rub or fresh herbs directly into the beer for an extra flavor boost.
Setting Up Your Smoker
Preheat your smoker to 250°F (121°C). If you’re using a charcoal smoker, set it up for indirect heat. For wood, I find a combination of apple and hickory gives a perfect balance of sweet and savory smoke flavors.
Smoking Process: Where the Magic Happens
Positioning the Chicken
Carefully lower your seasoned chicken onto the beer can, using the legs to create a tripod for stability. If you’re using a beer can chicken holder, now’s the time to secure it. Place the chicken in your preheated smoker, positioning it so the legs are facing the heat source.
Optimal Temperature and Time
Maintain a consistent temperature of 250°F (121°C) throughout the smoking process. At this temperature, your chicken should take about 2 to 3 hours to cook, depending on its size. The key is to cook until the internal temperature of the thickest part of the thigh reaches 165°F (74°C).
Wood Chip Selection
As mentioned earlier, I’m a big fan of using a mix of apple and hickory wood for smoking chicken. Apple wood provides a sweet, fruity smoke that complements the chicken beautifully, while hickory adds a classic, robust smokiness. Feel free to experiment with other woods like cherry, peach, or maple to find your perfect flavor profile.
Monitoring and Basting
While the low-and-slow method and the beer can help keep the chicken moist, I like to take it a step further. Every hour, I quickly open the smoker and spritz the chicken with a 50/50 mixture of apple juice and beer. This not only adds flavor but also helps achieve that gorgeous mahogany color we’re after. BUT MAKE IT QUICK!!!!
Serving and Enjoying: The Moment of Truth
Removing from the Smoker
Once your chicken hits that magic 165°F (74°C) internal temperature, it’s time to carefully remove it from the smoker. This can be a bit tricky, so I recommend using heat-resistant gloves and having a friend help if possible.
Resting the Chicken
Resist the urge to dig in immediately! Let your smoked beer can chicken rest for about 15 minutes. This allows the juices to redistribute throughout the meat, ensuring each bite is as succulent as possible.
Carving and Presentation Tips
When it comes to carving, I like to remove the entire chicken from the beer can first. Then, I separate the legs and wings before slicing the breast meat. For a stunning presentation, consider serving your smoked beer can chicken on a large wooden board garnished with fresh herbs and lemon wedges.
The moment you’ve been waiting for has arrived. As you take your first bite, you’ll be greeted with a perfect harmony of flavors – the smoky exterior giving way to incredibly juicy meat infused with subtle notes of beer and your chosen seasonings. It’s a taste experience that truly captures the essence of outdoor cooking.
Smoked beer can chicken isn’t just a meal; it’s a celebration of flavor, technique, and the joy of cooking outdoors. Whether you’re hosting a backyard barbecue or simply treating your family to a special dinner, this recipe is sure to impress. The combination of moist, tender meat and crispy, flavorful skin is hard to beat.
Remember, the beauty of this recipe lies in its versatility. Don’t be afraid to experiment with different rubs, wood combinations, or even the type of beer you use. Each variation brings a new dimension to the dish, allowing you to create your own signature smoked beer can chicken.
So fire up that smoker, grab your favorite beer, and get ready to embark on a flavor-packed culinary adventure. With a little patience and these tried-and-true techniques, you’ll be amazed at what you can create. Happy smoking, and here’s to many delicious meals ahead!
FAQs:
- Can I use a non-alcoholic beverage instead of beer? Absolutely! You can use non-alcoholic beer, apple juice, or even chicken broth. The key is to have a liquid that will create steam and infuse flavor into the chicken. My kids seem to like the Dr. Pepper chicken!
- How long should I smoke the chicken if I want to cook it at a higher temperature? If you prefer to cook at a higher temperature, like 350°F (175°C), your chicken will cook faster – typically in about 1 to 1.5 hours. Just be sure to monitor the internal temperature closely to avoid overcooking.
- Is it safe to eat chicken that’s been cooked with a beer can inside it? Yes, it’s perfectly safe. The beer inside the can doesn’t actually boil, but rather creates steam that helps cook and flavor the chicken from the inside. Always ensure the internal temperature of the chicken reaches 165°F (74°C) for food safety.